.
God’s Masterpiece Props

.
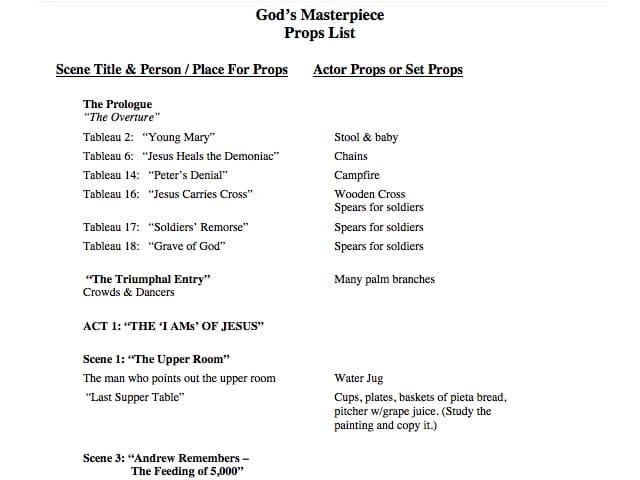
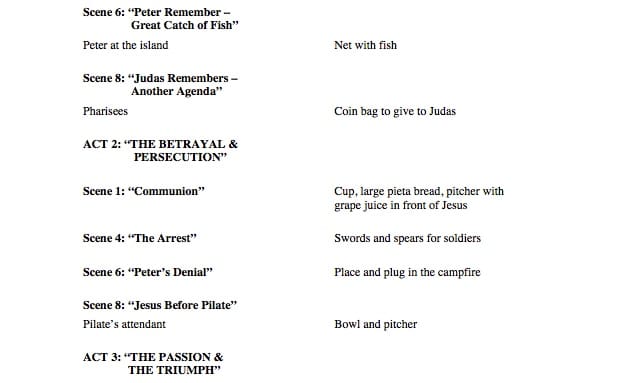
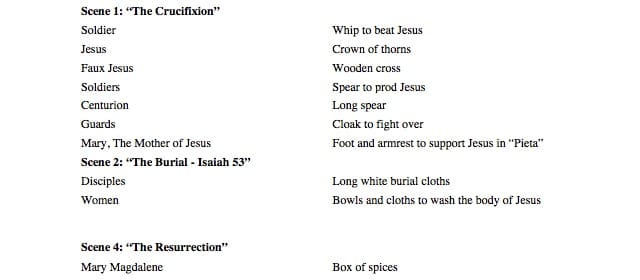
This listing of the props needed to perform God’s Masterpiece is listed according to Acts and Scenes, and is included on the Performance Package page. You can also download it here:
![]() Download the “God’s Masterpiece Props List.”
Download the “God’s Masterpiece Props List.”
Prop Placement:
Where you store these props is up to you, but it is handy to place them in the locations where people pick them up. The Props Coordinator and her crew should have a checklist organized by set area with a list of the props that appear there.
Props Table:
When props are expected to be carried on, it is a good idea to have a props table where the actors can swing by and pick up the prop, or the props crew person can hand it to the actor at a specific time. A props table is made by laying a piece of 3 ft., white butcher paper on a table back stage, and tracing around the props that should be placed on the table in order of their appearance in the show. Label the silhouette with the name of what should be there, for example, “rocks for stoning.” With this system, one glance at the table tells you what’s missing if an outline is vacant.
Set Props:
Set props can be confused with set decoration. Be sure it is clear between the two crews as to which one will be responsible for what items; for example, who will put the net full of fish by the Island for Peter’s “Great catch of fish” scene? Set props vs. actor props can cause confusion if it isn’t clearly spelled out.


The “Roll-out Campfire” For Peter’s Denial
Materials List:
- A “faux flame” unit (purchased at a party or theatrical supply store)
The unit is made of bright orange and blue lights and a fan under one or two pieces of shimmery, reflective cloth. When the lights are on, they reflect onto the cloth. The fan blows the cloth and the combined effect looks like a fire flame.
- A sheet of plywood (approx. 3’ x 3’) onto which the flame unit, logs and optional wheels are attached.
- 5 small logs (approx. 3” in diameter and 2’ long)
- 4 wheels (optional)
- An extension cord (long enough to reach off stage)
- An “on and off” switch (optional)
Directions For Assembling The Campfire:
- Purchase the “faux flame” unit
- Attach the wheels to the underside of the plywood base (optional).
- Attach the “faux flame” unit onto the plywood base.
Assemble the logs in a “teepee” over the flame unit. Attach one of their ends to the plywood and the other ends to each other at the top.
